
Quick Take: Clear skin photos help you see what is normal so you know when to act.
Clear images show the exact color, shape, and edges of spots. If you notice a change, these photos can ease your worry and guide your next steps. They help you decide whether to watch a spot closely or get advice right away. Trusted visuals like these let you make safe, informed choices about your skin.
Visual Identification of Common Lesion on Skin Pictures
Quick take: High-quality skin photos let you see what looks normal versus what might need a closer look.
Triage box:
• If you notice any of these red flags, call emergency services now: a spot that grows quickly, changes color, or starts bleeding.
• If you see spots that hurt or feel different than usual, seek same-day medical advice.
• If your spot is stable and matches common appearances, simply monitor it and note any changes over time.
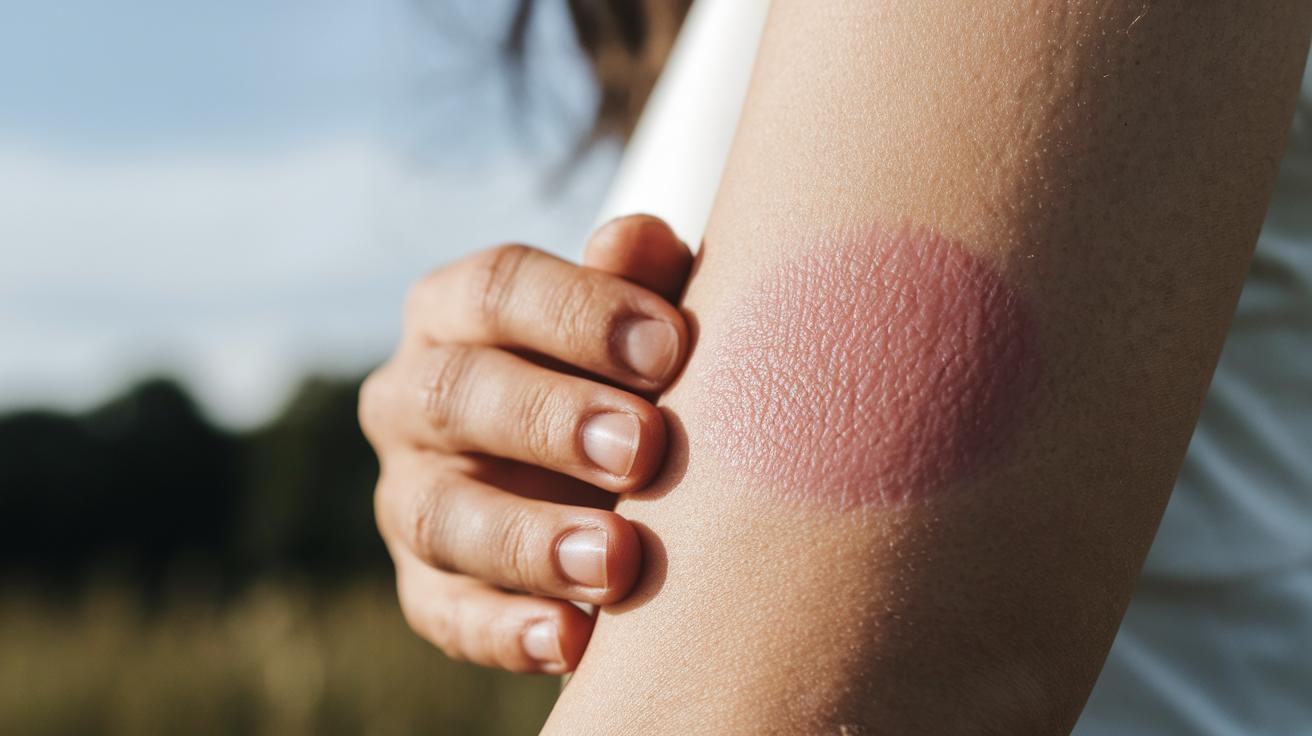
Detailed images of skin marks help you feel more at ease. Clear, close-up photos show the exact color, shape, and border of everyday skin spots. These images let you compare your own marks to a trusted gallery of common lesions.
For example, a clear, high-definition photo might show a skin tag on the neck. The picture shows a soft, flesh-colored bump with smooth edges. This visual tells you that this little growth is typical and not harmful.
Below is an HTML table summarizing 11 frequently seen benign skin spots:
| Lesion Type | Appearance | Sample Photo |
|---|---|---|
| Seborrheic Keratosis | Light brown, black, or tan growth that may itch or bleed | Example image showing a slightly raised, uneven surface |
| Dermatosis Papulosa Nigra | Small, dark spots common in darker skin tones | Close-up image highlighting uniform small dots |
| Stucco Keratosis | White-gray, scaly bumps on the lower legs | Photo showing fine scales and smooth edges |
| Skin Tags | Soft, flesh-colored protrusions on the neck, armpits, or groin | Image capturing a small, pedunculated growth |
| Cherry Angiomas | Bright red, tiny capillary spots | Vivid picture of red, round marks |
| Dermatofibroma | Firm, round, brownish-red nodules, often on the legs | Clear image with smooth, rounded borders |
| Solar Lentigo | Tan to dark flat patches from sun exposure | Photo of age spots with even pigmentation |
| Sebaceous Hyperplasia | Enlarged oil glands with a slight bump | Image showing a noticeable central dimple |
| Epidermal Inclusion Cyst | Movable bump that may feel filled with soft, cheese-like material | Image highlighting a smooth, mobile nodule |
| Milia | Tiny 1–2 mm white-yellow bumps | Close-up shot showing very small papules |
| Lipoma | Soft fatty lump under the skin, which can be several centimeters | High-resolution picture showing a subtle, movable mass |
Every image in this collection shows clear details. These visuals help you feel reassured by showing the usual look of common benign spots, making it simpler to track any changes over time.
Contrasting Benign and Malignant Lesion on Skin Imagery
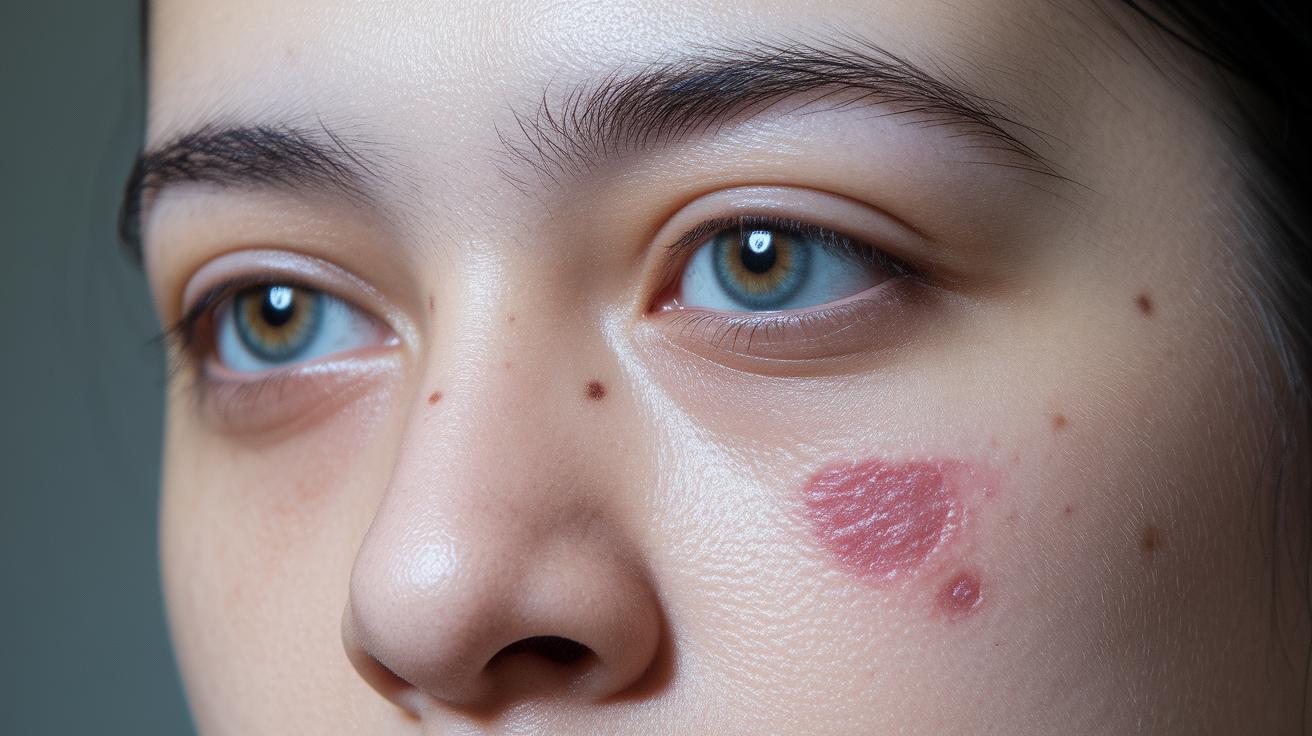
High-definition skin images let you see the difference between stable, harmless marks and ones that might need prompt care. Benign marks keep one color, have smooth edges, and stay the same over time. Malignant lesions often have uneven shapes, irregular edges, and a mix of colors like dark brown, black, and red. For example, if one side of a mark is smooth while the other side has odd curves, it may need closer review.
Look for red flags in your skin marks:
- Asymmetry (one half looks different)
- Irregular border (edges that are not even)
- Mixed colors (more than one shade)
- Diameter over 6 mm (about the size of a pencil eraser)
- Changes in size or shape
- Surface issues such as bleeding or sores
- New spots that appear in adulthood
These signs help you tell if a mark is likely harmless or if it might be cancerous and need further testing like a biopsy. For instance, actinic keratosis may show up as a rough, scaly patch smaller than 2 cm and could lead to more serious conditions. Always track any changes and consult a clinician if you notice these red flags.
Dermoscopic Lesion on Skin Pictures for Early-Stage Detection
Quick take: Clear, magnified skin images can show early warning signs.
If you have any of these emergency signs, call emergency services now:
- Rapid changes in a lesion's color, size, or shape
- New bleeding, pain, or itching around the lesion
Urgent concerns: Watch for unusual patterns on your skin.
Basic self-care: Keep tracking your skin changes and get professional advice if you notice a sudden shift.
High-resolution skin photos give you a close-up view that can spot early changes. These images may show subtle signs that could be a warning for more serious issues. With smartphone-based tools, you can capture clear, detailed pics to help you track small changes over time.
Digital tools focus on common patterns like an uneven pigment network (patchy areas of color), dots or small globules, and streaks or blotchy areas. For example, a clear, magnified photo might show a scattered pattern of tiny dark dots on a spot. This could be an early sign that you should monitor more closely.
Polarized imaging adds extra detail by showing blood vessel patterns that lie just under your skin. This helps differentiate a regular mark from one that might need a closer look. Digital guides can instantly flag areas that display worrisome patterns, like an irregular mix of pigment and blotchy streaks.
Using these high-definition images, both clinics and you can record the normal look of your skin and see changes over time. These clear visuals help reduce worry by showing what normal early signs look like and guiding you when to seek timely professional help.
Photography Best Practices for Capturing Lesion on Skin Pictures
Quick take: Capture clear, steady photos in consistent lighting to help track skin lesions accurately.
If you notice any rapid changes in your lesion's look, such as increased size, color shifts, or bleeding, seek urgent medical help.
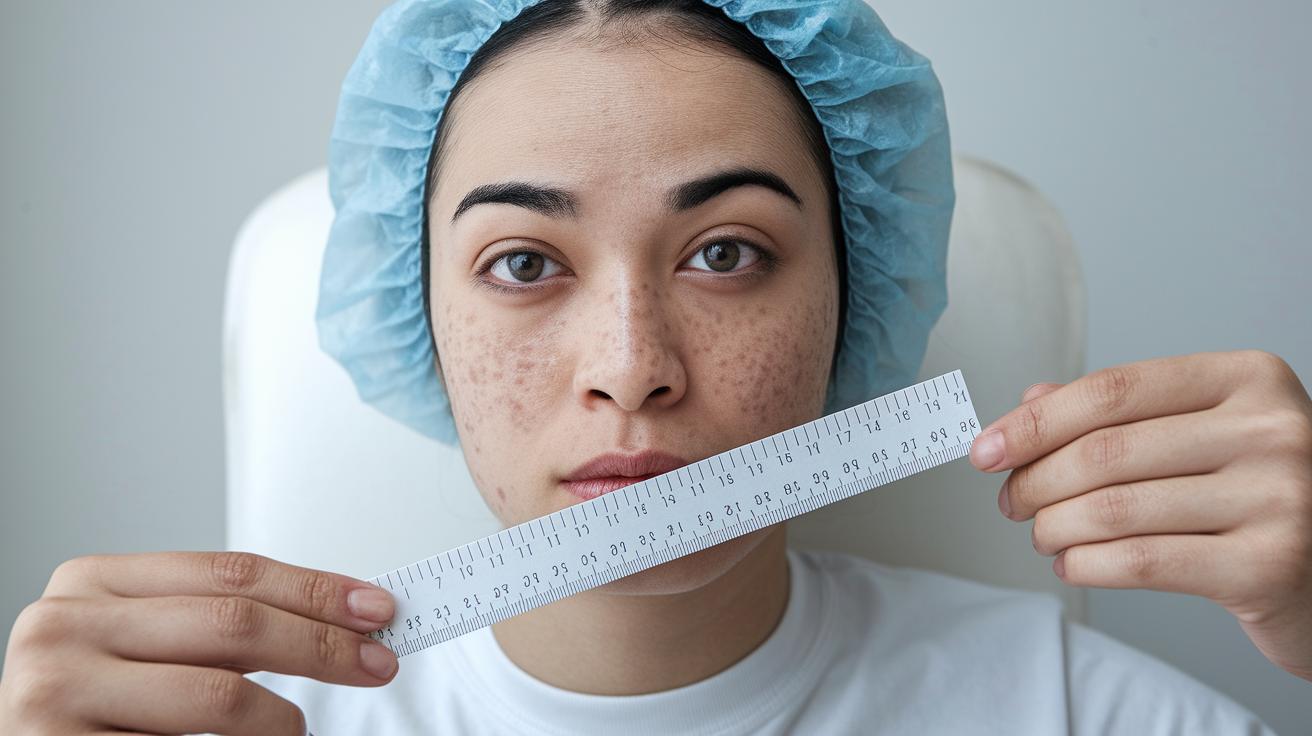
- Use a plain white or gray background so nothing distracts from your lesion.
- Place a ruler with millimeter markings in the shot to show the lesion's size.
- Keep the camera at the same angle and distance every time you take a photo.
- Use soft, diffuse light instead of direct flash to avoid glare.
These simple steps help you create a solid record of your lesion. High-quality images make it easier for your doctor to spot small changes like shifts in border, color, or texture. This careful approach can improve your discussions with your clinician and guide the next steps in your care.
Monitoring Progressive Lesion on Skin Pictures Through Comparative Analysis
Quick take: Comparing skin photos every few weeks can help spot early changes.
If you notice any of these red flags, call your clinician:
- New irregular borders
- Rapid growth
- Uneven color distribution
Take a new photo every 2–4 weeks to build a timeline of your lesion. Look for small shifts in the edge shape, slight color changes (darker or lighter spots), and subtle texture differences. Place your current image next to an older one to see these changes more clearly.
You can boost your review with these simple techniques:
- Use digital overlays to spot small differences by layering an older photo under a new one.
- Break the lesion image into grids so you can measure changes in each small area.
- Turn on contrast enhancement on your device to reveal tiny color shifts that might otherwise go unnoticed.
Keep a basic log with the date, your measurements, and any new details you find. This record gives your clinician important clues, sometimes catching early changes that regular photos might miss.
| Technique | Purpose |
|---|---|
| Digital Overlay | Spot subtle changes by comparing layers |
| Gridded Analysis | Measure small changes in specific areas |
| Contrast Enhancement | Show minor color shifts early on |
If you notice new irregular edges, unexpected enlargement, or uneven coloration, contact your clinician for advice.
Lesion on Skin Pictures Red Flags Indicating Need for Professional Review
Clear photos can help your doctor spot any changes that might need a closer look. Use a good camera and take pictures in natural light so you can see the lesion's size, color, and edge shape clearly. For example, a sunny day photo might show a dark spot with an uneven border that just appeared.
| Warning Sign | Action |
|---|---|
| Rapid expansion | Call your doctor; the lesion is growing quickly. |
| Pain or tenderness | Get checked; this may signal an infection (such as cellulitis or MRSA). |
| Irregular dark spot or bleeding | Seek urgent review; these features are concerning. |
| Non-healing ulcer | Request prompt assessment; wounds that do not heal need attention. |
Keep track of any changes by taking photos regularly. Compare your pictures over time and share them with your doctor so they can decide if you need further evaluation.
Lesion on Skin Pictures Case Study Visual Journal
Quick take: Clear photo logs can help you and your clinician spot changes in skin lesions early.
This case study shows how skin marks can change over time. One patient tracked a small mole for 6 months. The first photo from January 5 shows a light brown mark about 4 mm with an even border. Follow-up photos on March 10 and May 15 show the mole darkening and the edge becoming uneven. By July, the changes were clear. The lesion was then removed, and a photo after treatment confirmed that the skin looked normal again.
Every entry recorded the date, size, brief notes about the lesion (like “March 10 – mole measuring 4.5 mm; slight darkening noted”), and a clear picture. This method helps both patients and clinicians keep track of any changes.
Another set of photos documents a cherry angioma (a red, benign skin spot) after laser treatment. The first snapshot on February 2 showed a bright red spot on the forearm that was 3 mm in size. Later photos revealed that the spot gradually became smaller, less red, and caused less discomfort. Detailed records like these offer a simple way to monitor skin changes over time.
| Date | Lesion Type & Size | Notes |
|---|---|---|
| Jan 5 | Mole, 4 mm | Even border, early stage |
| Feb 2 | Cherry Angioma, 3 mm | Bright red; reducing after laser |
These visual logs are practical tools. They help you and your doctor see changes clearly and decide if further treatment is needed.
Final Words
In the action, you explored a range of high-resolution lesion on skin pictures to help spot common, benign marks and red-flag images. The guide explained how detailed images, proper lighting, and consistent methods improve tracking changes over time. You learned what signs to monitor, when to seek professional review, and how dermoscopic techniques can catch early problems. Keep a close eye on any unusual changes, and remember: accurate imaging is a key tool in keeping your skin health in check. Stay observant and proactive in your self-care.
FAQ
What skin disease images and charts can I view?
The visual guides include a range of skin images and charts showing common benign conditions, fungal infections, and even early skin cancer signs. These resources help you recognize typical lesion features.
What do skin lesions look like?
Descriptions of skin lesions mention bumps, spots, and patches that vary in color, size, and shape. These features help you differentiate whether a lesion appears harmless or needs further evaluation.
What does a skin cancer lesion look like?
A skin cancer lesion often shows uneven colors, irregular borders, and a size greater than 6 mm. It may also evolve over time, which means it’s important to have it checked by a professional.
What causes lesions on the neck?
Lesions on the neck can result from benign skin tags, sebaceous hyperplasia (enlarged oil gland openings), or irritation. Environmental factors and minor infections also contribute to their appearance.
What are the most common skin lesions?
Common skin lesions include benign spots like skin tags, seborrheic keratosis, solar lentigo, and milia. These are usually harmless but should be monitored for any changes in size or color.